Statement of intent:
This project title is 'Texture'. Within this project I will look at different styles of textures like man-made and natural. I know that in this project I can get a lot of professional and intriguing photos. I plan on having different styles of photos as well, such as: black and white, manipulated images, etc. I will also be researching many different photographers and attempting to replicate their style in this project and to give me inspiration for the variety of shoots I intend to do.
My research for this project will include creating mood boards on a variety of different photographers with different styles. I will also try to research photographers who manipulate their images like Andy Small for inspiration on how to edit my photos and make them more unique and interesting. After creating the mood boards I will plan a shoot that will be in the style of those photographers and try to replicate some of their ideas to improve my own photos. Photographers who have worked with the things I am going to work with would be preferable, like Edward Weston and his work on shells, this would be useful for me to research in order to gain a better understanding of how to take a better picture of this kind of object. Just some of the photographers I could possibly look at are: Edward Weston and his work on shells and black and white edits, Lucy Shires and her work with more man-made textures and 'colder' edits, Annabelle Breakey and her work with fruits and vegetables with her unique manipulations, Andy Small who also has very unique edits with fruits and vegetables and Laura Zalenga with her work with kaleidoscopes.
My initial ideas for some shoots would be to have several fruits and vegetables and organise them to create a less natural or more natural image. For instance I could create a circle out of the leaves off of a cabbage. Another shoot could be of some shells and show off their patterns and shapes, therefore showing off my skills with the camera getting closer images. Then I could move on to more man-made textures by doing a shoot in a classroom maybe and take pictures of the objects in their like rulers, rubbers, tables, etc. This would change my gallery because man-made objects are normally more rough and differently shaped compared to natural. Also trying to capture their patterns and up-close textures. Another shoot could be outside with plants and bricks to combine the natural and man-made textures in one shoot, again showing off my photography skills as the lighting is natural I will have to use my camera settings correctly. Pictures of more natural-looking scenery would be more beneficial because it could make a good edit, like a leaf with water on it after the rain.
During this project I hope to learn how to do kaleidoscopes because I think they are the nicest manipulations with this topic. Also the work that Andy Small does would be very fun and challenging to replicate so that would also be something I would like to attempt. By the end of this project I want my final format to be a final gallery filled with my best images/manipulations showing off my best skills and unique images I am going to take, I want it to show off what I would have learnt throughout the project and how much I have developed the skills I am struggling with.
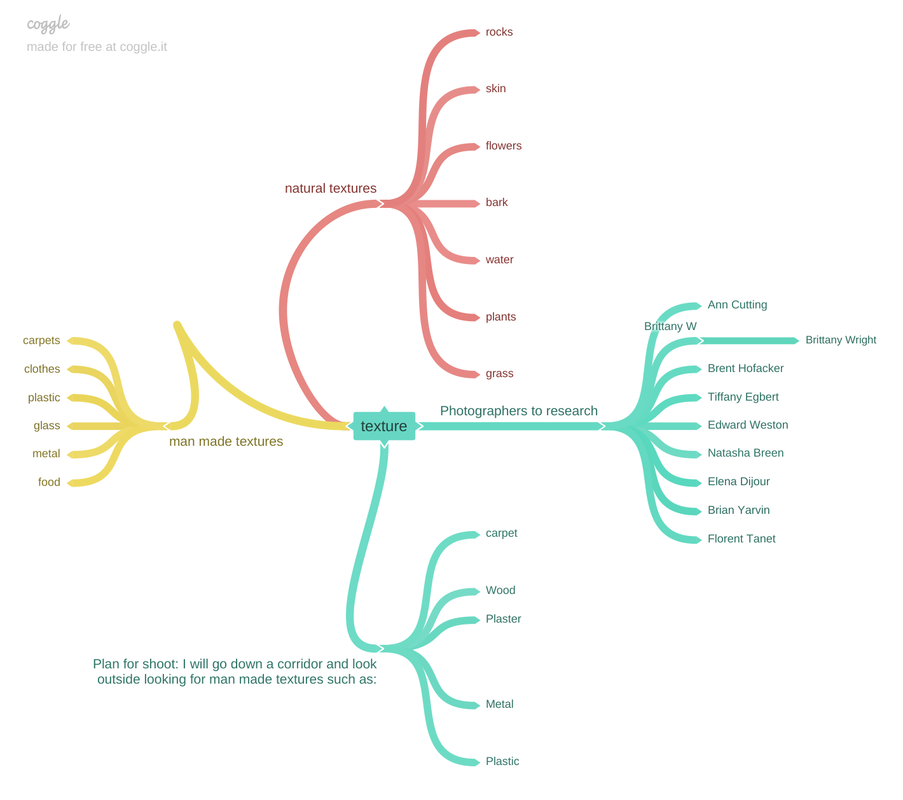
Mind Map Texture:
Analysis
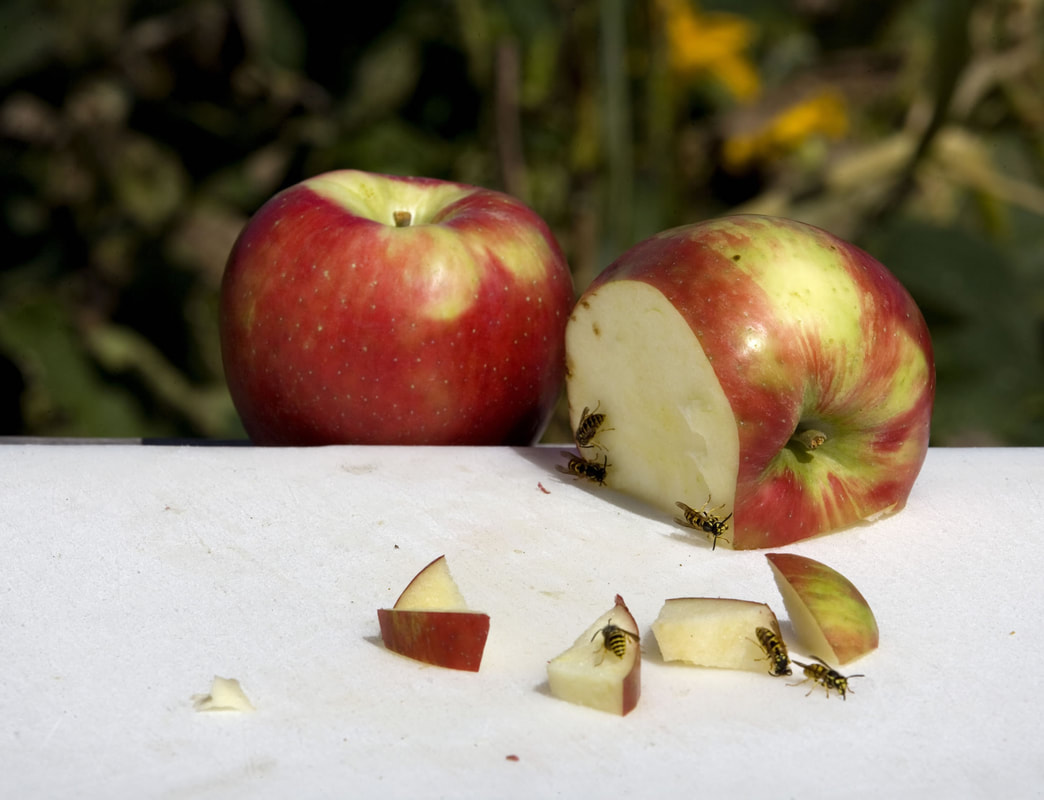
It is a photograph of two apples with one of them being sliced and eaten by wasps. I think the amount of wasps in the image makes it better because it makes your eyes dot around the whole frame allowing you to see more of the picture. It is by Roe Ethrige, it is a still life image. It is a very realistic photograph. The background is out of focus, this could have been done to draw attention to the two apples. Red and green colours have been used which are opposites on the colour wheel, meaning they contrast nicely, these are called complementary colours. The warm golden colours in the background are also mirrored in the apples and fruit. It is called C’est pas du luxe, which means to have too much and have it go to waste, this changes the way you look at it because it suggests that the apples are going to waste. In my opinion, I think it represents how we let so much food go to waste because we get too much of it and don’t use it. This is an issue as it could be used to support those with less. In my opinion it could be a message that we should not waste food because some are too unfortunate to get it, I think this because of the name of the photograph and the content of it being apples being eaten by wasps due to ungrateful people. The image is outside which could add to the theme of life and nature.
I have researched and established a date linked to the C’est pas du luxe. Through my research I cannot find when it was taken. It was taken by Roe Ethridge. It could have been made for the public, to show them that wasting things is not ok and should never take things for granted. As of today he is 51 years old. He explores how pictures can be easily replicated and recombined to create new visual experiences. He was born on the 8th August 1969 in Miami, Florida, United States.
In the photograph, there are multiple rules used, like rules of evens, because there are two apples and there are six wasps. The depth of field results in the background being out of focus and our attention is drawn to the fruit, then we notice the wasps. There is also some symmetry, going horizontally across the photograph. You could say they have used the rule of thirds because the two apples are at the top of the image are drawing your eyes to that part of the picture. The depth of field is useful in the picture because it draws your eyes to the central objects. The symmetry is useful because it makes the picture balanced. Proportion in this picture is used to draw your eyes to the apple being eaten. The perspective makes you feel like you are on the table watching the wasps eat the apple. The picture is in the foreground because the apples are right in front of the camera. The lighting is most likely a studio light as there is a shine to the apple that suggests a soft or disused light was used. The camera’s ISO is normal (around 100-200), I estimate this because the lighting isn’t too low or too high and the image isn't grainy. The shutter speed would have to be very high in order to capture the wasps in a frozen picture, maybe something like 1/1000. The aperture would have been used because the background is out of focus and the foreground is in focus. I suspect he has used a tripod to steady his camera. The F stop makes the shell more exposed compared to the rest of the image meaning it would be around f/5.6 or lower. The white balance would be around 5000K or above because it looks like the overall image looks more realistic than it would if the white balance was lower than 5000K. The photographer could have used a tripod to capture the wasps in focus. Because this picture was taken outside, the white balance would probably either be cloudy or daylight. This makes the image more exposed and look more natural. However there is a very good chance that this image was taken inside and was set up because there are six pieces of apple and six wasps, the wasps would most likely fly away if this was outside and also the lighting on the apples looks more like a studio light then a natural light. Therefore they could have used a lower white balance like tungsten or fluorescent. This person could have used a tripod to steady to camera for the wasps because otherwise they might have been out of focus. The main colours of this image are probably white, green and red.
I like their work because they have used shutter speed to capture the wasps which is very hard to do. This makes the image look a lot better because you can see the wasps actually eating the apple and they aren't out of focus. This links to my work because I will also be taking pictures of fruits and natural subjects. I will also be trying to use f/stop and shutter speed to improve my images and make them more interesting. A strength of this image is the shutter speed being used to capture the wasps. A weakness of this image is that some of the wasps that were too close to the camera are out of focus, I think if these wasps were also in focus the image would look more aesthetically pleasing. I would like to achieve this sort of image like having a two of the same fruit in an image and having one more in the foreground in focus and having one of them in the background out of focus. My outcomes will hopefully look a little similar to this image when I do fruit and vegetables because this image has a lot of unique qualities to it. Doing an image like this will more than likely improve my skills with the camera and its settings.
Second Analysis
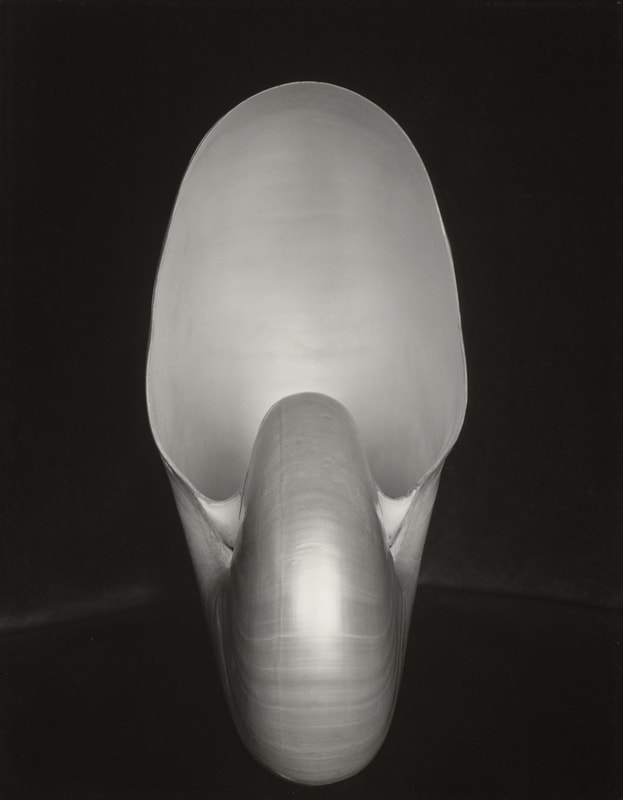
Nautilus, Edward Weston (1927)
This image was taken in 1927, it was taken in his studio in Glendale, California. This photo was called Nautilus, it has been called “one of the most famous photographs ever made”. I cannot find where this picture was exactly taken. It was taken by a famous photographer, Edward Weston. It was made for the public to see. Edward was an American photographer born 1886 and died 1958. He was called “one of the most innovative and influential American photographers''. He photographed many different types of sceneries/objects… like: still life’s, nudes, landscapes, whimsical parodies, etc. He was the first photographer to receive a Guggenheim Fellowship due to his focus on the people and places of American west. A group called f/64 was formed in 1932 by Weston’s apprentice Willard Van Dyke was inspired by Weston’s work mainly on shells, which Weston joined that year. He was inspired to work on shells because he was prompted by a 1927 meeting with the Californian painter Henrietta Shore, Weston was her sitter at the time, she often used shells in her paintings and because Weston was there so much, the idea of using a shell for his work was pushed into his mind. He wrote in his diary of seeing these shells in her studio, stating that he had “never saw a chambered nautilus before. If I had, my response would have been immediate. He started taking pictures of shells after returning home, from a two day extension in Mexico, to America between 1923 and 1927. He took 26 still life photographs of shells, including the Nautilus.
The photo is literally just a black and white image of a nautilus shell standing on its end against a black background, hence the name “nautilus”. I think this image is a still life image because the shell is a natural texture. The piece is called “nautilus” because the subject is a nautilus shell. It is and isn’t a realistic picture because nothing has been added to make the image out of the ordinary, however you would not normally find a nautilus shell in front of a black background/wall set up in a framed manner. The light has been adjusted so that the bottom of the shell seems darker, I think this makes the image better because it draws attention to the sides of the curve at the end of the shell, because you see a darker tone here than anywhere else on the shell. The photo could be showing a lone shell, perhaps the last of its kind, and the background could represent its sorrow and feelings towards its life as a lone shell hoping to survive as long as possible. The message that could come across due to this photo is that you can never be happy when on your own and to always be surrounded by your friends and family in order to escape a life of solitude. Shells are usually an abandoned home of a sea animal that used to live in it, this adds to the interpretation of the shell being alone and isolated. The image is in a studio.
I can identify a few different rules used in this photo: symmetry because if you were to put a line down the middle of the image both sides would be the same, close ups, and maybe a little depth of field. The rule of thirds draws your eyes to the center of the image. The rule of odds is effective here because you only focus on the one subject, if there were more shells, you wouldn't be focusing on this one as much. The photographer uses a central focal point because you are looking at the shell dead on. As far as I can tell, there are no leading lines, your eyes are instantly drawn to the subject due to the lack of background in the image. Due to there being no background the depth of field is only slightly used in the sense that you don’t notice a background making the subject more noticeable. The lighting is most probably a studio light and you can see the shine on the shell meaning it was in front of the shell. The shot has been framed so that your attention is only on the subject in the image. Due to it being 1927 and the image being in black and white, it’s hard to see what ISO, aperture, white balance, etc… they are using. However, the ISO makes the shell itself more prominent and easy to see, meaning the ISO could be around 400 or above. The F stop could also be making the shell easier to see as it makes it more exposed, this could be the result of the F stop being around 5.6 or lower. As the shell isn't moving the shutter speed wouldn't have to be low, meaning it would be around 1/120 or higher. The white balance is hard to judge in this image because it is black and white. In this image the photographer might have used a tripod to keep the image in focus. In these times developing a picture was a lot harder to do compared to nowadays; they would put a roll of film into a roll of celluloid and was put into a galvanized can/tank to be developed. now you just press a button and it's done.
I like this image because there’s not much to focus on, so whatever is there is the only thing you have to think about. His work links to mine because I also took pictures of shells in a lonely environment. The strengths of this work is that you only need to focus on one object and there is nothing else to distract you, the weaknesses of the image is the lack of background work, there could have been a brighter background so he could have shown off some depth of field a little more, or he could have added some other shells in the background that were on their side so that your attention wouldn’t fully be drawn to them. I want to achieve this sort if image like having a single shell to focus on because it looks quite sophisticated. Taking pictures like this can improve my skills with lighting and the camera in general.
Mood Boards:
Edward Weston


Lucy Shires: Mainly looks at man made textures and decay.


Annabelle Breakey- Uses lots of Fruit and Vegetables- Striking Colours and Arrangements.


Andy Small- Use lots of fruits and vegetables, painterly backgrounds and complementary colours.


Laura Zalenga- kaleidoscope photographer


First shoot:


Best:
This is my best picture from this shoot because the whole pineapple is in the frame and it is in focus. The aperture for this image was better than the other pictures which makes the image look brighter and easier to look at.
|
Worst:
This is my worst image from this shoot because it is out of focus and the object is out of the frame. If I could retake this image I would make sure it's in focus and move the camera up to get he object in frame. I could also change the aperture to make it a little brighter to contrast with the background.
|
Plan for Shoots
Name:
Luke Frame
Project Title/ shoot number:
Shoot number 1: fruit and vegetables.
Description of aims for shoot:
I am going to focus on taking photographs of fruit and vegetables in order to expose their colours and textures. I will use multiple different fruits and vegetables and try to use different arrangements in order to get the most out of the shoot, I could also slice them open in order to demonstrate their patterns on the inside of them.
Links with Photographers
I will try to mimic the style of Roe Ethridge in some of my images by giving them a darker lighting and background, I will also try to work in the style of Andy Small by trying to photograph brightly coloured fruits and vegetables. However, I will also use some of my own techniques and arrangements so that I can get used to doing shoots like this in the future. I will slice some of my items open and experiment with different types of lightings and backgrounds.
Location:
Props/ items needed:
Kit needed e.g. lighting, tripod, backdrop, macro lens:
Studio Shoot
Apples, grapefruit, cabbage, pomegranate, mushrooms, light box, colour film, tomatoes, corn on the cob, peppers
Camera and battery, different coloured backgrounds and spot light.
Camera settings I will use:
F-Stop :
White Balance:
Shutter speed:
ISO:
I want the main focus of the image to be the object and the background to be slightly out of focus, therefore I will use an F stop of 2-5.6
I am indoors so I will need to use Daylight, Tungsten or Fluorescent depending on the amount of sunlight that gets through to the image and what the other photographer’s images look like.
I won’t need a high shutter speed, therefore a shutter speed of 1/125 of a second would be ideal for an inside shoot with good lighting.
I will keep this low to keep the objects sharp and in focus. Therefore the ideal ISO would be around 100-200.
Which compositional rules will I use?
I may experiment with the rule of odds and evens, it could be hard to perform the rule of thirds, but I could try. I may experiment with symmetry or triangles, I will also experiment with some single objects in the style of Andy Small. I will mainly use central viewpoints but I will also try to use birds eye view to demonstrate my understanding of the compositions.
Mushrooms:


Tomatoes:


Cabbage:


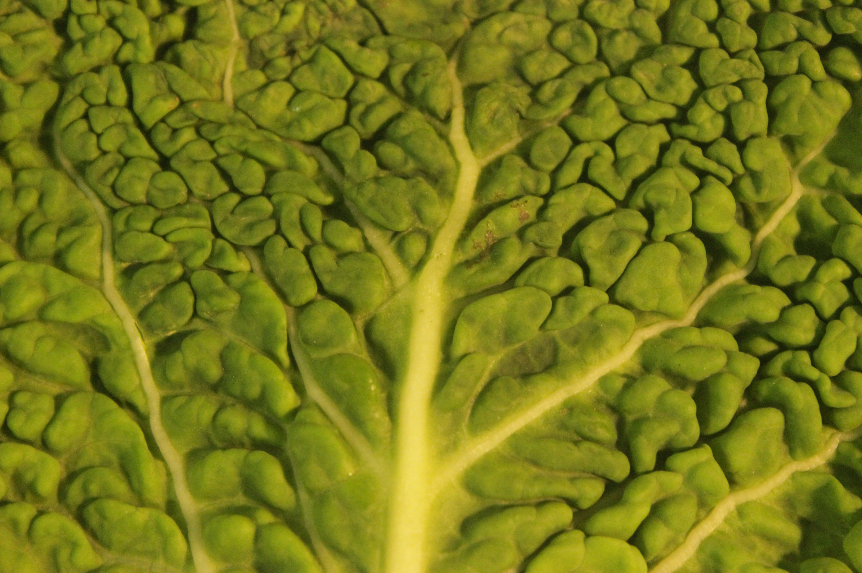
Best:
This is my best photo from the cabbage shoot because the white balance works with the colour of the cabbage. Because it is inside the white balance would usually either be tungsten or fluorescent, however it could be different to contrast with the environment. The ISO creates a good tone for it, it would have to be low ISO (around 400). The close up shot makes the texture easier to see which is better for this project. The lamp shining on the cabbage made the colour of it shine more. The aperture would also be low because the background is out of focus, meaning the aperture has been lowered to make the main focus the foreground.
|
Worst:
This is my worst image from the cabbage shoot because the white balance along with the warm lamp made the cabbage look orangey and it didn't work with the colour of the cabbage. The bottom of the cabbage looked ugly so it doesn't look appealing. If I could retake this picture I would make sure the lighting works with the colour of the cabbage and I would change the white balance, also I would change the angle because the bottom is ugly.
|
Grape fruit:


Best:
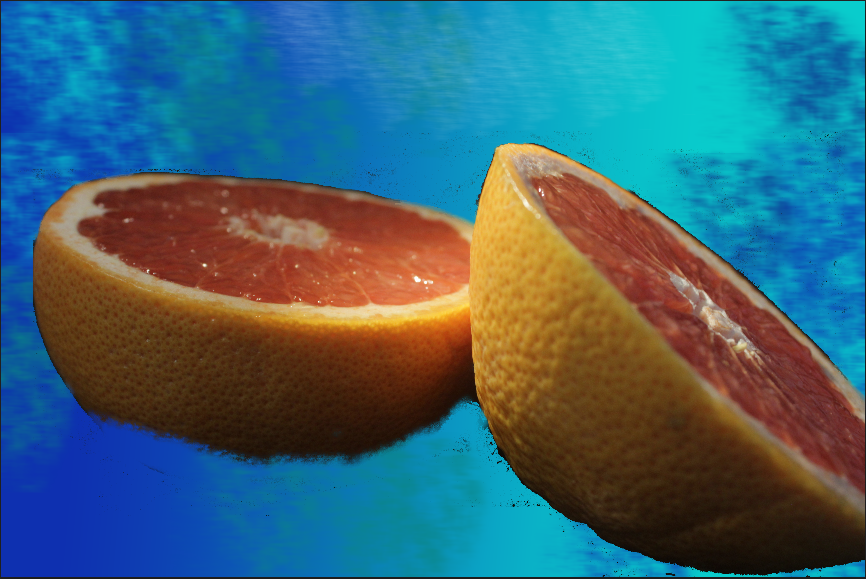
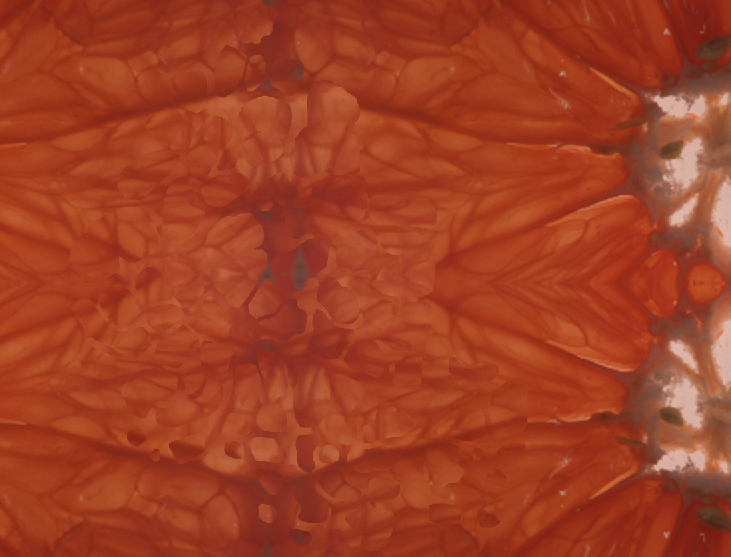
This is my best image with this fruit because the f/stop makes the background out of focus making you focus on the subject. The close up shot lets you see the texture of the subject. The use of rule of evens shows of my skills with the project. The lighting makes you focus on the middle of the subject and brings your eyes outward to see the whole thing. The white balance would have to be either tungsten or fluorescent because it is inside. The ISO works very well with the lighting because it makes the lighting more effective.
|
Worst:
This is my worst image with this fruit because the background is clearly in the shot and you can see the juice on the floor which isn't very professional. The lighting makes the image less appealing because you can see everything in the image that I didn't want you to see. If I could retake this image I would turn the lights off or at least make them dimmer to make the image look more professional like the best one, I would also change the f/stop to make the background less visible.
|
Shells:


Best:
This is my best image because the framing makes the image look like a beach or a never-ending pile of shells. The close up shows all the leading lines and other patterns of the shells, the birds eye view adds a sense of professionalism.
|
Worst: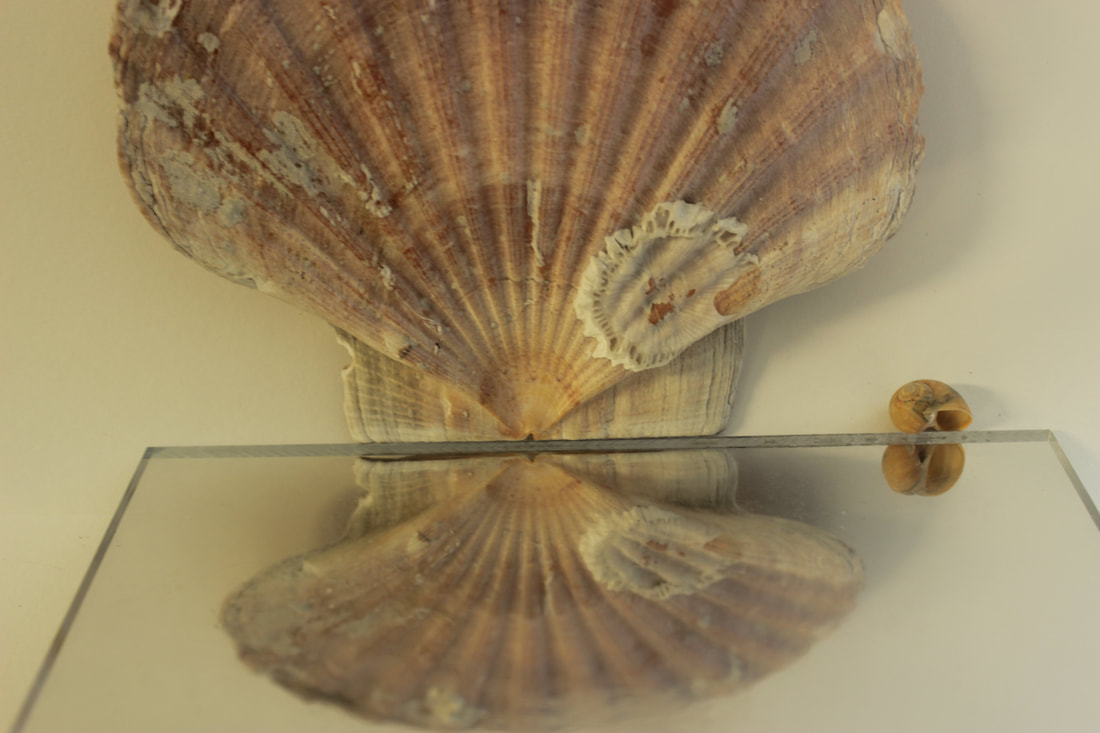
This is my worst image because you can see the mirror in the image. If I could retake this image I would get closer to the shells so the mirror isn't in the frame.
|
Sweetcorn:


Pomegranate:


Apples:


Bell pepper:


Plan for texture outside:
Name:
Luke Frame
Project Title/ shoot number:
Outdoor shoot 1
Description of aims for shoot:
I am aiming to work outside taking pictures of trees and leaves experimenting with different ISO’s and seeing how much they affect an image.
Links with Photographers
I will try to work in the style of Ansel Adams in the sense that I will try to take pictures of the natural objects outside like trees and leaves. However, I will also try to work in my own way because the way I am changing the ISO might make the image look nothing like an Ansel Adams photo.
Location:
Props/ items needed:
Kit needed e.g. lighting, tripod, backdrop, macro lens:
Outdoor shoot
Trees and leaves.
Camera, battery.
Camera settings I will use:
F-Stop :
White Balance:
Shutter speed:
ISO:
Maybe f/11 to f/16 in order to get a good depth of field around the object I’m taking the picture of.
I will probably use a variety of all the white balances in order to get a good range of contrast between the images and experiment with how they affect the image.
I will also experiment with this but ideally I would like to use a 1/125 or around that number to create a good image.
This will be my main focus of experimenting because the shoot is based on experimenting with the ISO, therefore I will start with the ISO really low and then work my way up to the higher marks.
Which compositional rules will I use?
(Rule of Thirds, even numbers, odd numbers, symmetry, asymmetry, leading lines,
patterns, repetition, triangles, birds eye view, worms eye view, central focal point)
Mainly I will use a central viewpoint, but will also use some worms eye view for some variety and also maybe some symmetry. I will try to make the images look a little like Ansel Adams’ images with these compositions but most of them won’t because they are going to be more of an experiment with the camera settings.
Plan for outdoor and indoor shoot:
Name:
Luke Frame
Project Title/ shoot number:
Man-made 2 (outside and inside)
Description of aims for shoot:
In this shoot I want to capture images of various man-made textures such as metal and wood, however this time I am going to do it outside as well as inside in order to capture more objects and expose different patterns and textures on different types of man-made objects. I am wanting to expose their textures up close to show what people might miss when looking at man-made objects.
Links with Photographers
In some of these photos I will be trying to work in the style of Lucy Shires in the sense that I will be trying to make it look scruffy and exaggerate the image to really show off that the object is man-made.
Location:
Props/ items needed:
Kit needed e.g. lighting, tripod, backdrop, macro lens:
School corridor (indoor), back yard (outside)
I won’t need many props as I will be moving around trying to capture as many different pieces of man-made objects I can..
camera , battery.
Camera settings I will use:
F-Stop :
White Balance:
Shutter speed:
ISO:
I will need a smaller f-stop as a lot of my images are going to have a lot of background so in order to make the subject stand out, the background will need to be out of focus.
The white balance will depend of the lighting in the corridor and the weather outside, indoor could be any of them that make the image look better, but outside, if it’s dark and windy, I could use the daylight setting to make it brighter, if it’s sunny, I could use cloudy to get more contrast, or fluorescent, or if I don’t want contrast I could use daylight.
I won’t need to worry about shutter speed as nothing is moving so it wouldn’t need to be very high. I should keep it around 1/25 or 1/50.
This will also depend on the brightness of the area, it might be better to keep it low so that the image isn’t just a white screen but not too low so that you can’t see anything other than a black screen.
Which compositional rules will I use?
I could use space to show off my background skills, I could use birds eye view, central focal point, maybe a little symmetry and maybe some worm's eye view as well.
Textures outside 2:


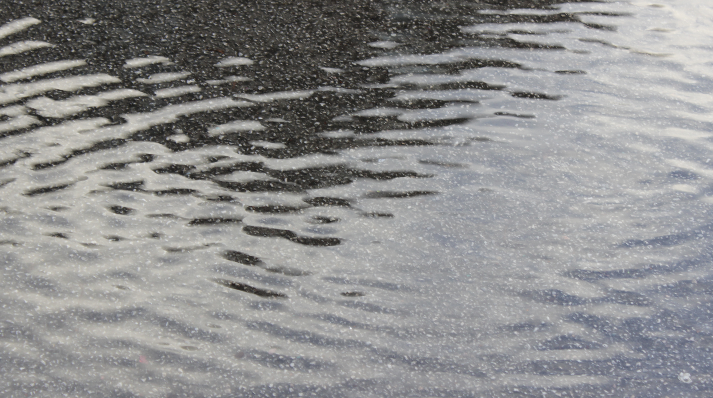
Best:
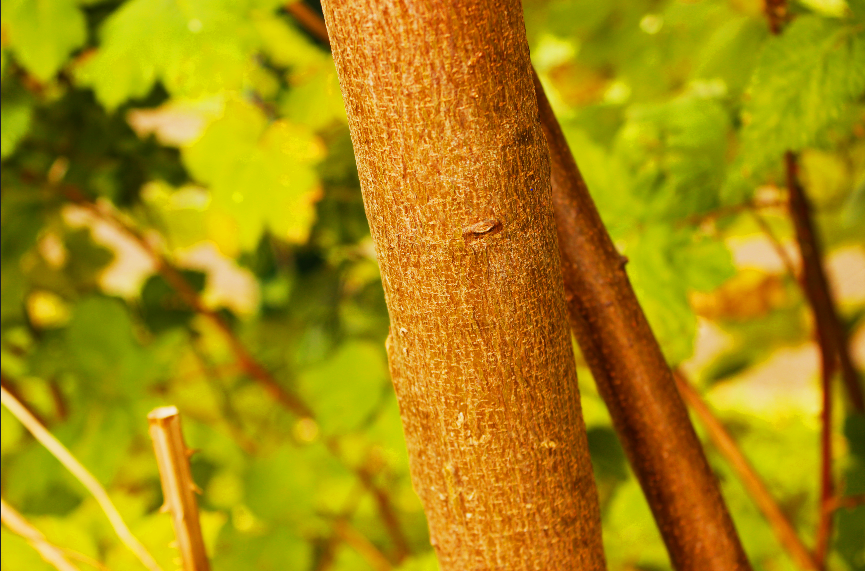
This is my best image because it has worms eye view, the f/stop makes the further away parts out of focus and the shine of the wet concrete makes the floor look more interesting.
|
Worst: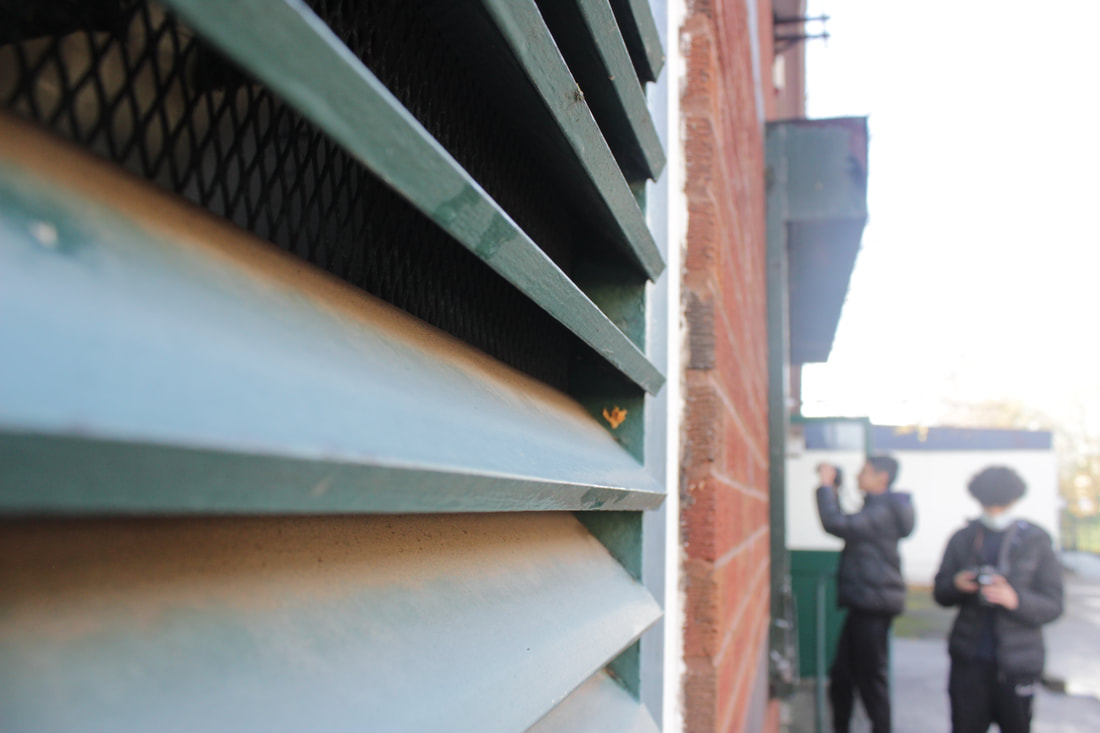
This is my worst image because although there is a nice leading lines effect, the image has two other people in it, so it was very bad framing and the image should be cropped. If I was to retake this image I would make sure no one was in the background.
|
Man made textures:


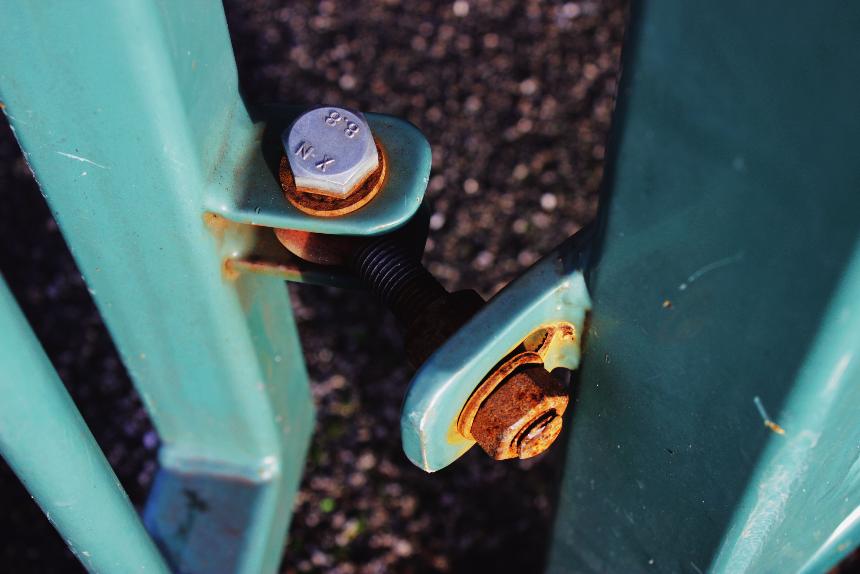
Best:
This is my best image because the framing is good making more of the subject visible while also using spacing. The use of leading lines. The ISO makes the colour of the subject more vibrant. The use of the f/stop makes the foreground in focus while the background is out of focus.
|
Worst:
This is my worst image because I was using a new lens and it didn't work, the aperture was too low as well. If I was to retake this image I would take the lens off and increase the aperture.
|
Man made textures 2:


Best:
This is my best image because the framing is good, using the space rule. The texture on the ruler makes it look really nice. The lighting adds a shine to the ruler. The f/stop makes the foreground focused.
|
Worst:
This is my worst image because there's not really a subject in it, however the leading lines is a good feature. If I could retake this image again I would back up a bit and make sure there is an actual subject.
|
Final Shoot:


Best:
This is my best image because the wide aperture makes the image more aesthetically pleasing, the background is out of focus and the foreground is in focus. The lighting is very nice on this image because one half is dark and the other is light.
|
Worst:
This is my worst image because the ISO was too high making the flower hard to see. The image was also out of focus. The subject wasn't fully in the frame. If I was to take this image again I would change the ISO and the aperture to improve the overall image.
|
Macro lens shoot:


Not macro lens shoot:


Homework:


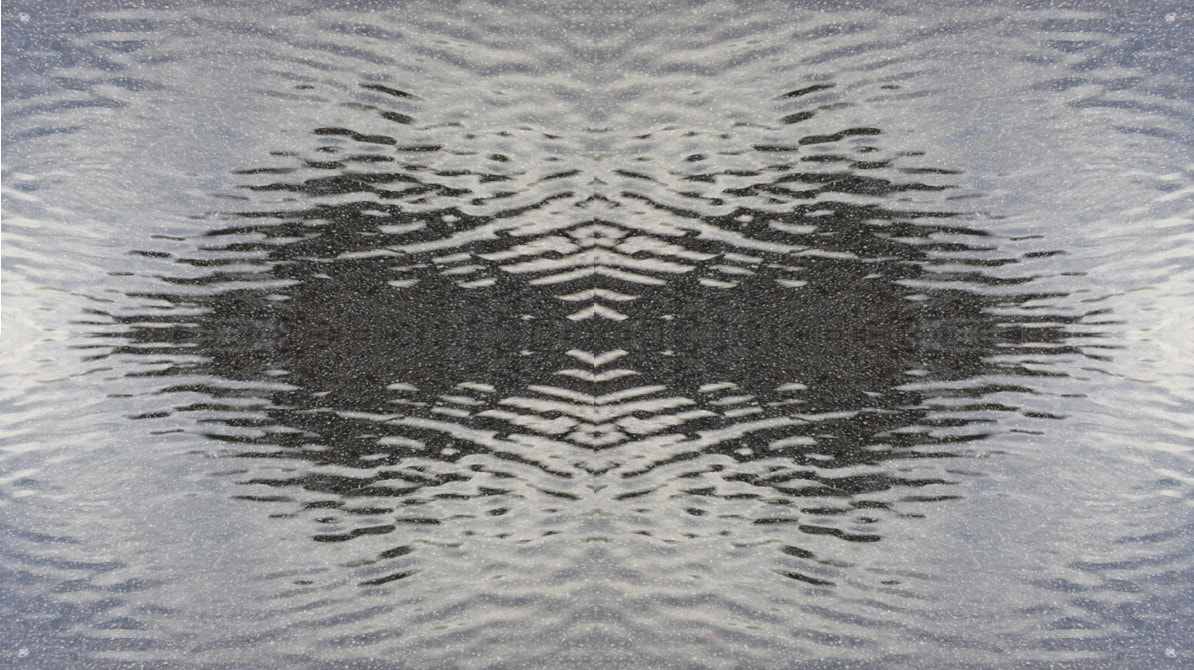
Kaleidoscopes in the style of Laura Zalenga:
|
Before:
|
After:

|
|
Before:
|
After:
|
|
Before:

|
After:
|
|
Before:

|
After:
|

|
Before:
|
After:
|
|
Before:

|
After:

|
Before: |
After: |

|
|
Before:
|
After:
|
Before:
|
After: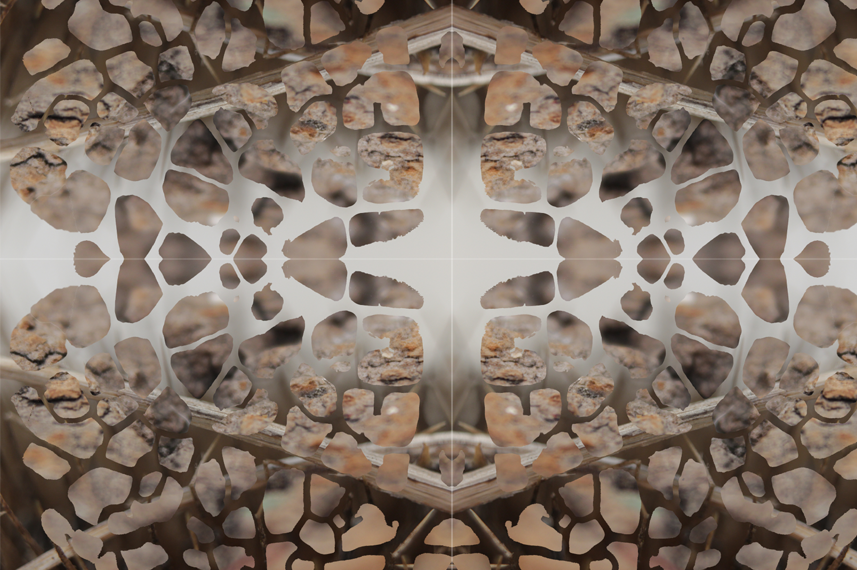
|
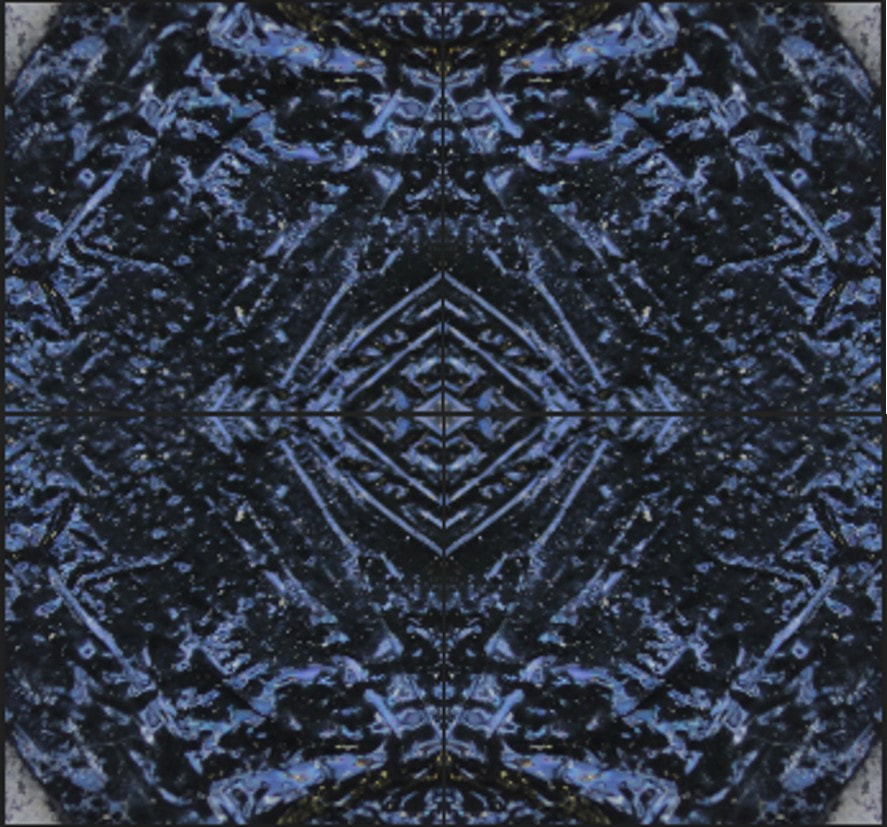
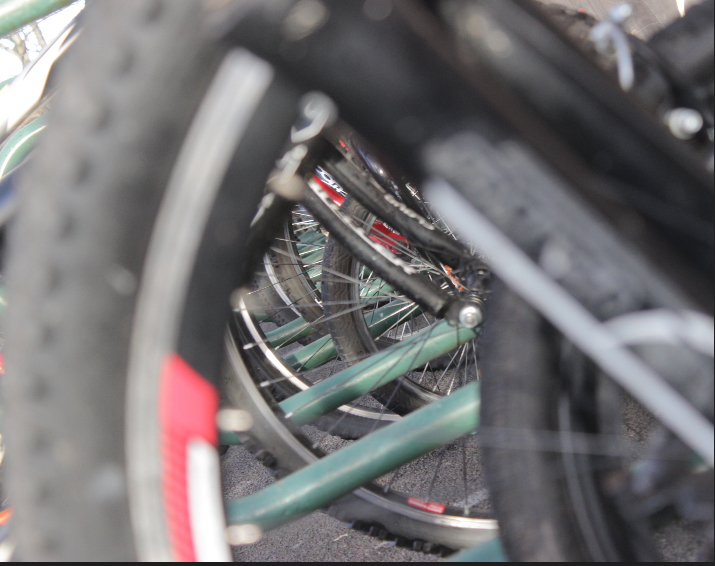
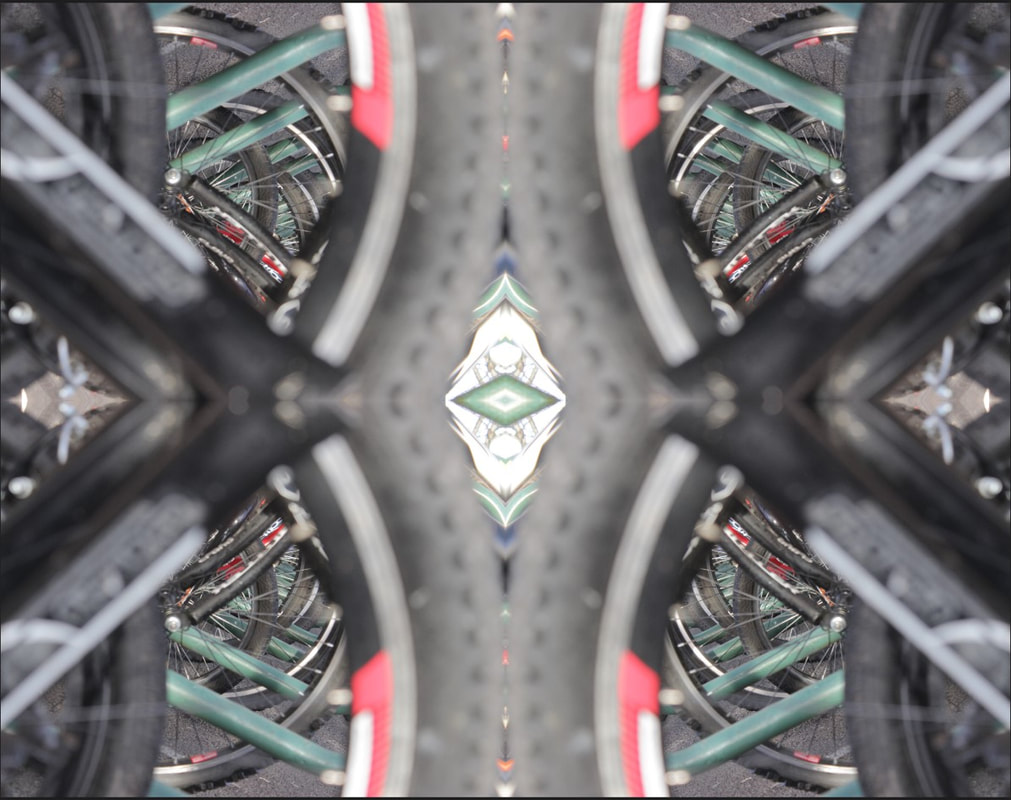
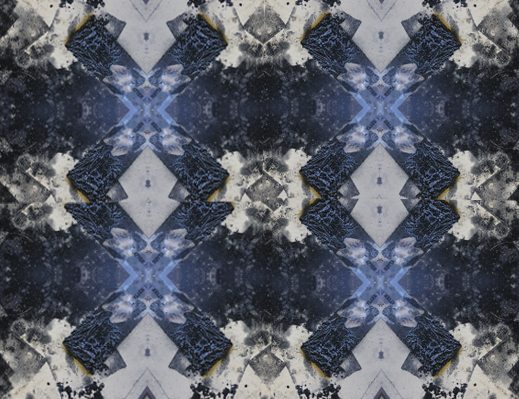
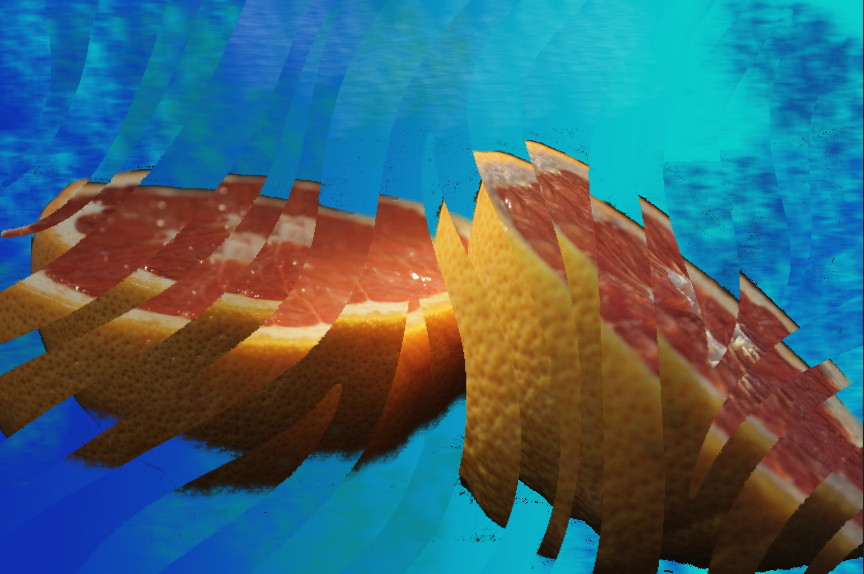
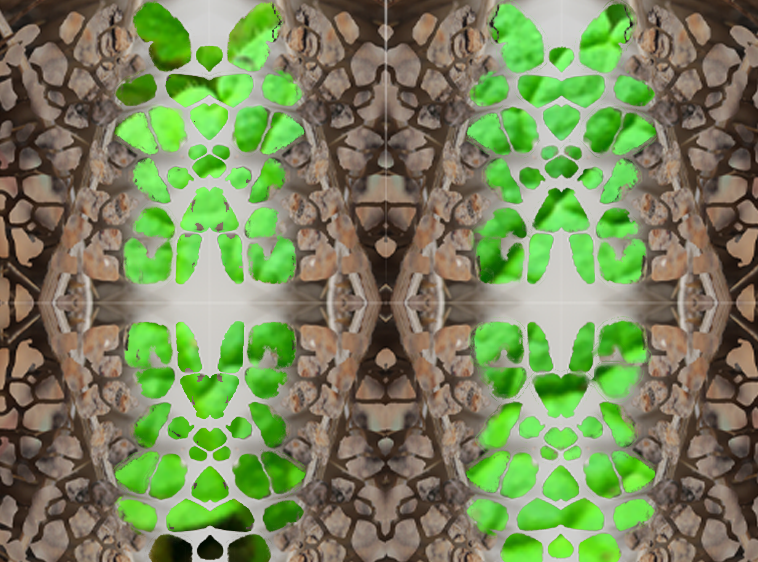
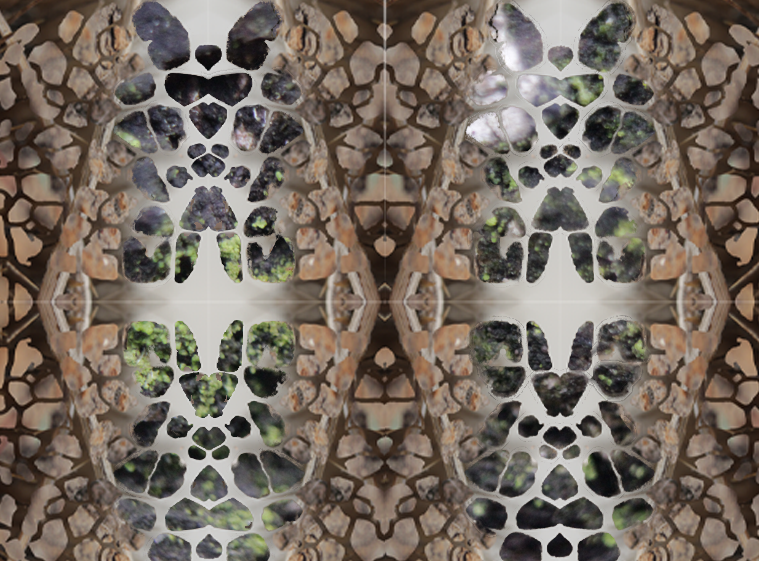
I have made these images link to my mood boards because they are similar to the work of Laura Zalenga who worked on kaleidoscopes, I have made my edits a little different to hers in order to make it more personal, however the inspiration for the edits have come from her and the mood board I made on her.
Lucy shires inspired edits:
|
Before:

|
After:
|
|
Before:

|
After:
|
|
Before:

|
After:

|
|
Before:

|
After:

|
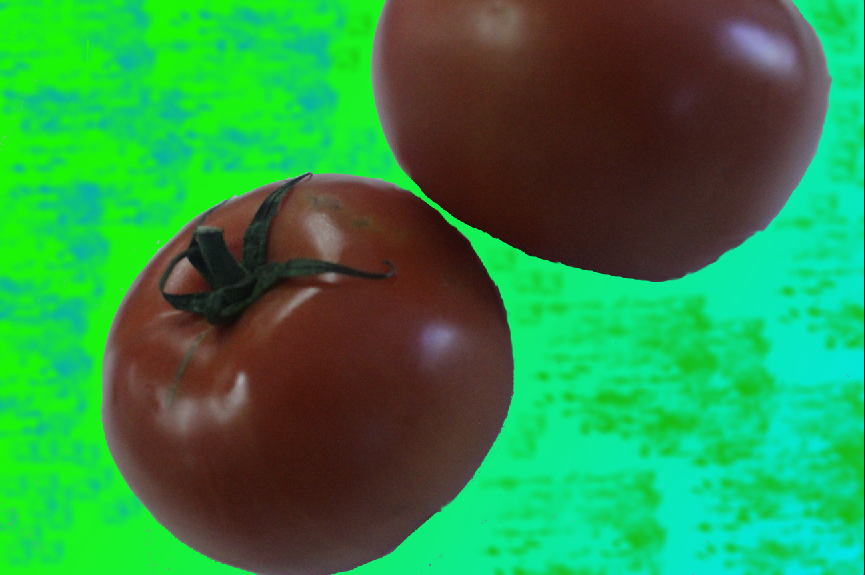
I have made these images link to my mood boards because they have been manipulated in the style of Lucy Shires. Her images were edited to make them look cold and gloomy, so I used this as inspiration for my edits and also went in the opposite direction at some points by making them look warm and comforting.
Andy Small inspired edits:
|
Before:
|
After:
Here I have used the paint brush tool to create the background. I had to use differently shaped brushes to make the style of the background more varied.
|
|
Before:

|
After:
I used the same tool to create this image as well.
|
These kind of manipulations are linked to another mood board because I used the style of Andy Small for inspiration to create these images. The background in particular has similarities to Andy's. Although, it is a little different again because I didn't want to directly copy him as that wouldn't show my level of skill and understanding.
Geometric mood boards:


Geometric pattern attempt:


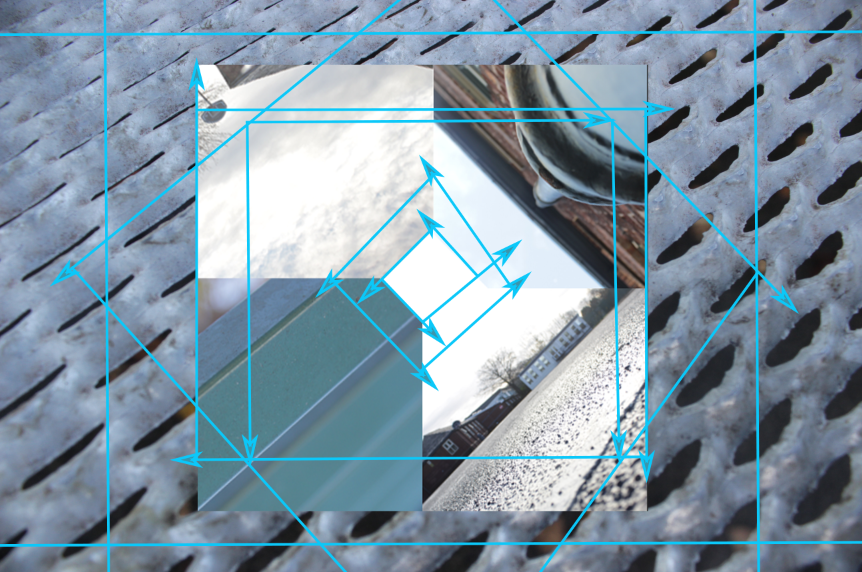
In this image I used the pen tool to make some geometric shapes. This makes it link to the mood board on geometric shapes, however it is slightly different because some of the images in the mood board have different coloured shapes in them whereas mine has one coloured line creating squares and diamonds. I finalized this image but decided it didn't look as good as I wanted it to be so I stopped making this type of edit.
Edits on photopea:


|
Before:
|
After:
To create the base for this image I used the paint brush tool for the background, however for the effect I used the quick selection tool on another image to crop out the unnecessary parts of it and added it to this image.
|
Edits on photoshop:
In these pictures I used an image off the internet for a base for my stencils to make the manipulation. I cut out the parts of the stencil I needed and then placed it underneath my actual image, then created a clipping mask to move the image and create the effect. Later on I started using my own pictures as a base for a stencil.
Edit 1:
Before:
|
After:
|
Edit 2:

|
Before:

|
After:

I did the same thing with the quick selection tool for this image.
|
Edit 3:
Before:
|
After:
|
Edit 4:
Before:
|
After:
|
Edit 5:
Before:
|
After: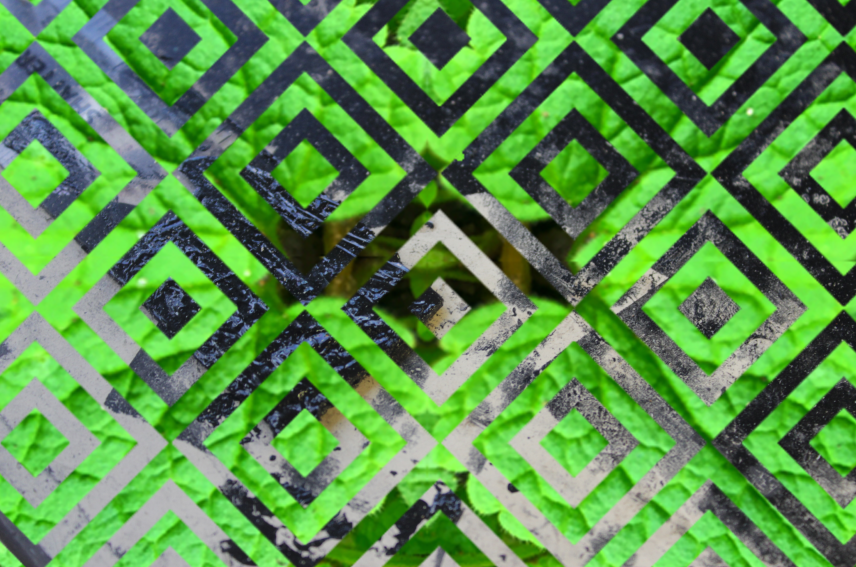
|
This is where I started to use my own images as a stencil.
Edit 6:


Before:
|
After:
|
Edit 7:


Before:
|
After:
|
Alternative outcome:

Edit 8:


Before:
|
After:
|
Alternate outcomes:
Edit 9:


Before:
|
After:
|
Alternate outcomes:


Edit 10:


Before:
|
After:
|
Alternate outcomes:
The images above link to the geometric mood board also because I have started to create the shapes within the image but it isn't quite the same as the mood board's images.
Manipulation mixture:

To create this image I used the kaleidoscope as a base and the geometric-like manipulation for the mixture of edits.
Final gallery:


Project evaluation:
This project's theme was natural and man-made textures. I quite liked this project because I think you can make much more aesthetically pleasing photos with things like flowers and plants compared to other projects. The part of the project I found most interesting was the kaleidoscope edits because they look very complex and elegant.
I have experienced many new techniques like how to get worms eye and birds eye views, how to use the rule of thirds and many other compositional rules. I have also learnt how to use the camera settings to make an image more high-quality.
A technique I would like to develop further is using the camera settings to better the image because I feel I could have made some of my images better by adjusting the camera like using f/stop to make the background less focused. Through this project I have researched a number of professional photographers like: Edward Weston, Lucy Shires, Annabelle Breakey, Andy Small and Laura Zalenga. I have used the research I did on these professionals to influence my own work and used them as inspiration for some of my edits. I feel the most successful part of this project was my second analysis because of the detail I went into describing it and the meaning it could have had. Although my kaleidoscopes are also quite a successful part of the project as they make the less quality images more elegant. The main problem I had with this project was that my website disappeared and I had to redo a lot of my work, however apart from that a problem I had was the limitations of the areas we could take pictures because of covid; We weren't allowed to go on any trips which could have benefited my project a lot. This meant I had to try harder on what we were allowed to do and I made me work harder on the edits to make sure they are the best they could be to make up for the time and privileges I had lost. If I could complete the project again, I would take more pictures than I originally did so that I could have more choice between what images to edit and more choice between my best and worst.
